
The Torment Forbidden Traverse
trip report and media by: Ryder Stroud
with contributions from: Woody Jacobson
Foreword: My writing style assumes that climbers who have ended up here on my website are looking for guidance, both written and picture-based, for this route. To that end, the I try to describe our trip in what accurate detail I can muster after the fact. However, I also understand that some of you who have arrived at my website also believe in a higher standard of the “spirit of adventure,” a principle for which I have a great respect and have maintained in some of my own climbing trips.
If you are the type who wishes to maintain more mystery in their pursuit of this route, I recommend you stop reading after the Permits and Logistics section at the latest!
Have fun. Find adventure. Be safe.
- Ryder
Intro

The route in its entirety viewed from the approach trail to Boston Basin.
One of Washington’s and the Cascades’ most classic traverse routes, the Torment-Forbidden Traverse, more often referred to as the “TFT” by Northwest climbers, is a feather in the cap for any mountaineer looking to test their toolbox of mountain skills.
above: an aerial view of the route via Google Earth (click to enlarge).
The climbing is never hard, but the terrain types and rock quality are diverse. Since the route is so conditions-dependent, you will need to tackle everything from loose rock to unconsolidated snow, from glaciers to frozen turf. While there is lore of people climbing the route car-to-car in a single day, our experience suggested that doing so requires not only high-level skill and risk tolerance, but also a bit of luck in getting the right conditions that allow for fast passage through many sections of ridge.
If there is late-season snow dotting certain sections of the route, you will have more transitions to negotiate between snow, rock, and glacier travel. We took a moderately long 2 days, starting a bit later than we would have liked on day 1, leaving at 10am and finishing late on day 2, around 10pm. A guided party we encountered on-route elected to climb it in a casual 3 days.
Having been a multipitch rock climber for years, I never fully appreciated how much transitions matter. Of course, transition speed matters in big rock climbs. However, transitions in the alpine have added complexity and additional gear, making efficiency a key to success if attempting the TFT in such a limited time frame like we did. Having just finished a trip and gotten off from work and with more work looming in 3 days time, Woody and I had exactly zero turnaround time before we headed out to climb the route.
If you are coming from a rock climbing background, be prepared for a lot of different, non-rock climbing situations on rock that is less-than-ideal. There is a lot of time spent in the “no fall zone,” if you want to move fast enough to do the route in a casual 2 days. While the climbing is never hard, there is plenty of exposure to stare at!
If you are coming from a mountaineering background, a lot of the terrain is… par for the course.
Be prepared to be mentally “switched on” over the course of 1.5 miles of exposed alpine terrain starting from when you enter the gully on Torment to when you rappel all the down Catscratch Couloir onto the snowfield beneath Forbidden.
Download part 1 and part 2 of our GPX track here. There is a gap in the map right where we crossed the snow traverse, but there may be boot pack to guide you there!
Permits and Logistics
Boston Basin is one of the most well-traveled backcountry destinations in the Cascades.
Consequently, it receives the title many climbing areas are receiving today of being “loved to death.” North Cascades National Park has sought to control the impact of human traffic through a permit system. While some can be reserved during the off season, 5 permits are allotted for walk-ups.
Walk-up permits: Issued up to 24 hours prior to your entry into Boston Basin. This means if you can get to the office before 4pm on the day prior to the start of your trip, you may be able to score a permit. For those on a standard work schedule, sneaking away from work early to go to the otherwise remote Marblemount Ranger station will prove to be difficult. You can see the number of walk-up permits available by using the convenient web app that the Park Service has on their website. 2024 Update: THIS PROCESS HAS CHANGED THROUGH RECREATION.GOV AND OCCURS ONLINE FOR RESERVATIONS.
NPS backcountry permit webapp.
Make sure you choose “Cross Country Zones (south of SR-20)” to get the search results that will include Boston Basin.
If you have to get the permit the same day, you will need to show up EARLY to the ranger station. Their new system involves taking one of those butcher shop-style pink tickets from a dispensing machine near the entrance of the ranger station. Make sure you grab one right when you get into the lot!
My partner, Woody, and I camped out near Marblemount in my van and woke up just before 5am to get to the ranger station. While it was not great sleep, we were the first ones in the lot. By 6:30, the lot was full of at least 2 dozen people, all hoping to get their desired permit. There was only a single permit left for Boston Basin during our only trip window between work, so we were a bit nervous about getting shut out. Being the only ones in the lot that early in the morning was a huge relief!
If you end up being shut out of the Boston Basin permits, there is still a workaround. Since most people begin their trip by climbing Mt. Torment (hence it being named the “TFT” and not the “FTT”), you can actually begin the traverse from the next basin west, the Torment Basin. While beta for the approach is slightly sparse, it is possible to get up to the same notch that starts the TFT. Even better, the Torment Basin permits are separate from Boston Basin, and climbers rarely ever use this basin to start the climb.
above: The lower approach to Boston Basin is a rainforest, complete with a bit of bushwhacking, especially surprising for such a well-traveled trail.
If you are willing to find slightly more adventurous approach, you can absolutely have a back up plan if Boston Basin is too crowded.
While the trail is likely less traveled, some resources on the Internet have some info to get you started. Via Summitpost’s description for Mt. Torment:
Torment Basin TH
Approximately 4.5 miles past Mineral Park CG (or 21 miles from Marblemount) is a bridge across the North Fork of the Cascade River. Park beyond the bridge and locate a climbers trail paralleling Torment Creek approximately 100-200 yards east of the creek. Ascend past treeline and camp wherever you please. I have not personally done this approach, so I can't offer much more detail.
Boston Basin camp as seen from a trip I guided up the West Ridge in 2022.
Boston Basin TH
About 6 miles past Mineral Park CG (or 22.5 miles from Marblemount) locate a small parking area (i.e., a wide spot in the road) opposite Johannesburg Mountain. The trail leaves from the northwest of the parking area, and there is a small wilderness sign festooned with the usual NPS info sheets. Approximately 2.5 miles of trail and class 3 tree roots lead 2,500 feet up to the lower camp on a moraine (pit toilet, small number of camp sites, great setting). Another mile or so and thousand feet of relatively good trail lead to the upper camp (pit toilet, many more camp sites). Two hours to lower camp, three to high camp. Both are fine base camps for Torment and other peaks in Boston Basin
Of course, Boston Basin is the ideal. The trail is steep and has significant undergrowth during its first third. But it is so well-traveled that the path to the basin itself is clear for its entire length.
For another great resource on the Torment Forbidden Traverse, check out Steph Abegg’s trip report on the route. Her website is FULL of excellent information–way more than you will find here (though I hope to start adding more here soon!).
Woody approaches the Boston Basin camp and the beginning of the traverse across the Taboo Glacier.
Getting to the Route
Across the Glacier and to the Start of
Mt. Torment
Once you access the Basin proper, you will follow a well-worn path up towards the West Ridge, ascending a long, gradual heather (a large chunk of dirt and grass among otherwise rocky and snow-covered alpine terrain) that will dump you onto the snowfields beneath the Forbidden. From there, you will traverse directly west across the snowfields, passing some bivy spots on rocky sections in the snowfields, though these areas may be dry if you go late enough in the season (i.e. late July and August). To your west will be a rocky ridge that slices south and towards your line of travel. Round the toe of this ridge.
The yellow lichen on the headwall that above the notch that provides access to the South Ridge of Mount Torment.
From here, you have options. The snowfield ahead (to your west) is tiered, with snowfields separated by short rock bands. Once you pass the ridge, you will be on the middle of three obvious tiers. To the west of the ridge, you will find a moderately steep snow slope, up which you can ascend. This will dump you on the eastern edge of the top tier snow field/glacier leading to Mt. Torment. If this slope is out of condition (a possibility since it ascends a constriction in the terrain with water undercutting it on both sides), you can continue west along the snowfield until you reach a weakness in the rock band that will allow you to access the snowfield/glacier above.
Once on the glacier beneath Torment, head straight for the mountain. The access gully is not obvious from your point of view traveling on the glacier. You are essentially heading to the highest point of the glacier to your west, aiming for a bunch of steep couloirs on the southeast face of the mountain.
Steph Abegg’s beta mentions looking for “yellow lichen” on a headwall above the access gully. This detail proved to be immensely helpful, as the yellow lichen is visible from a ways across the glacier.
With snow recently melted out from a section of the notch to the South Ridge, Woody and I are left with a mix of rock, sand, mud to climb to access the South Face of Mount Torment.
Once you ascend to the highest section of the glacier on the west side, the gully should be obvious. It is a very square-cut notch that breaches the otherwise steep, loose, and imposing South Ridge and the steep walls of the lower Southeast Face.

Onto the Route: Mount Torment
Depending on the time of year, you may find a lot of snow, bare rock, or a mix of the two. We found a mix of the two. A short steep snow slope led to a bunch of narrow ledges and less-than-vertical terrain. We ditched our crampons at first convenience and continued up easy terrain through a chimney on the right side of the gully. The chimney is easy, but the top had its fair share of loose rocks and wet sand and mud left over from the melting snow. While the climbing is easy (at most a couple of low 5th class moves if you eschew being directly in the chimney in sections), falling would be a scary prospect.
The notch to access the South Ridge. We took the chimney on the right side. The snow to the left looked appealing from below, but it was actually undercut and broken part way up the gully.
Woody considers chimneying between the snow and rock to gain the ledge and the rock climbing on the South Ridge of Torment.
The notch eventually yields a bit of a flat section where the ridge separates Boston Basin from Torment Basin. We wormed our way between a snowfield and bare rock to a ledge big enough for 2 people at the start of the proper rock climbing.
Doing some creative, multi-medium climbing to surmount the moat onto the South Ridge of Mt. Torment.
From this ledge, you will see an imposing chimney system above you. It may be tempting to head for the first weakness you see, but the best route actually heads out to the climbers left from the ledge. You will see short, relatively shallow left-facing corner on less-than-vertical terrain.
We elected to change into our approach shoes and climb this without a rope in a climbing style we quickly began referring to as “Choss Honnold-ing”–or just simply “Chonnolding”–as we climbed over less-than-ideal rock with occasionally dizzying drops to the glacier below.
A few low 5th class moves will wrap you around the steep terrain you saw on the ledge, leading to a lot of exposed 4th class terrain with the occasional easy 5th class move on the west side of the South Ridge. After the section passing the short corner, you will end up on a big ledge with a steep step above leading to easier terrain.
While most of the climbing on Mount Torment's South Ridge is easy 5th class, there are a couple of sections that are both exposed and require some real rock climbing!
Woody climbs some of the easy terrain between steeper steps on the backside of the South Ridge.
One of the crux steps that contained some 5th class climbing on the South Ridge.
Woody launches up some of the easier slabs on the South Ridge. Eldorado Peak looms in the distance.
Woody climbs up some of the steeper steps on the South Ridge.
You will know you are on the right track if you can locate the series of rappel stations that dot the South Ridge route. You are following easy terrain and grassy ledges up towards a couple of steep step that guards more scrambly terrain to access the Southeast Face.
Exposure! Some of the upper sections of Torment have some moderate climbing with some dizzying exposure!
If you get onto the correct line, you will eventually reach a steep step in the terrain that is unequivocally 5th class. It is a near-vertical slot but with plenty of edges and holds to work with. Surmounting that section will lead you back to easy 4th class terrain that leads up to a notch in the ridge with a prominent, finger-like gendarme to the climber’s right.
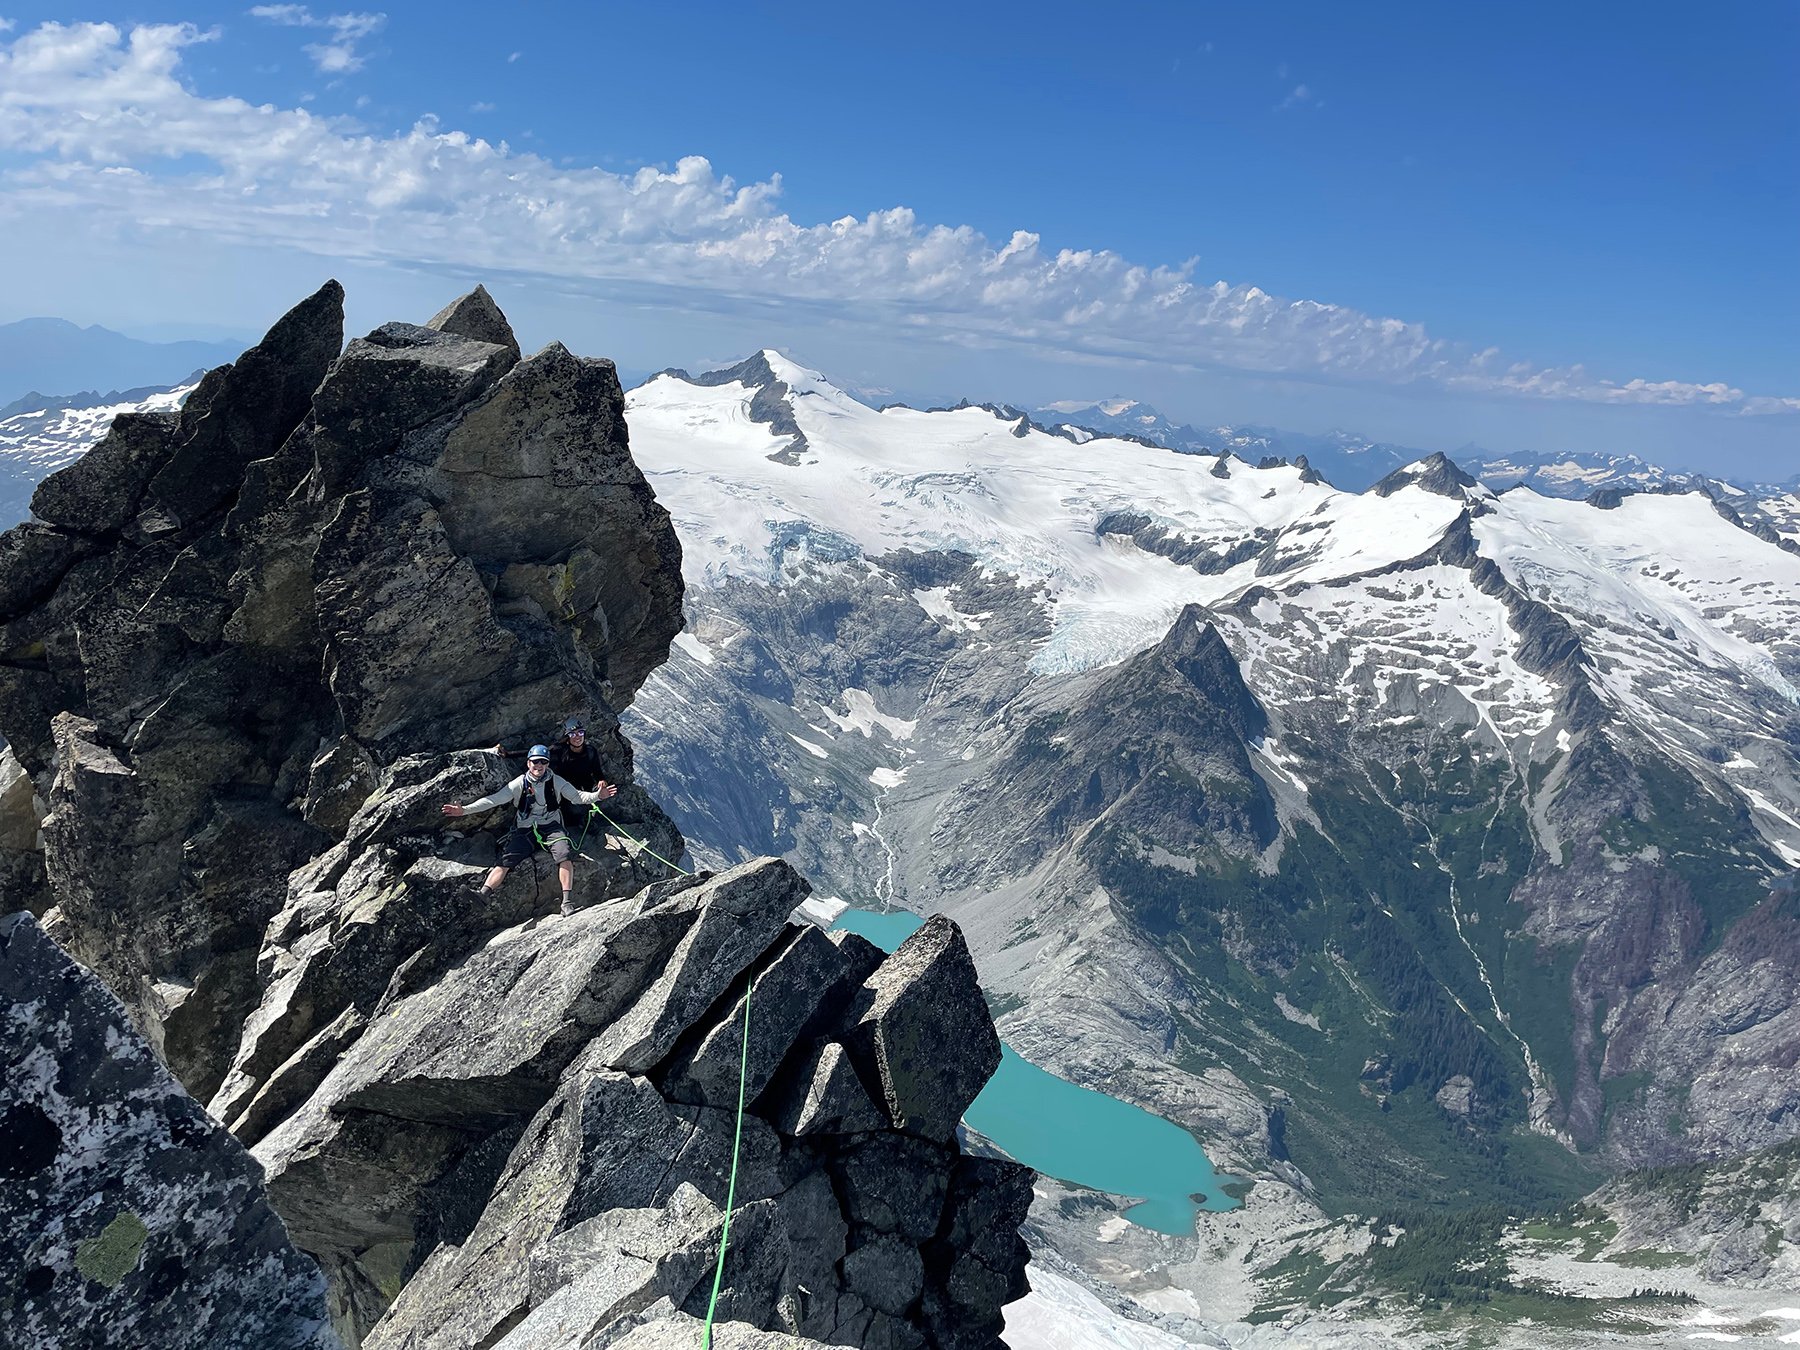
Woody poses at the summit with a friendly reminder of how much terrain was left on the route. The granite horn of Forbidden Peak dominates the skyline.
Cross onto the Southeast Face to find scrambly 3rd and 4th class terrain. Follow the path of least resistance across the face and begin to trend uphill (climber’s left) towards the summit of Torment. Easy but loose terrain will yield a steep, loose step of rock that you can either ascend directly or attempt to skirt around. Skirting this step may involve squeezing between rock and snow terrain on a persistent snowfield near the top. Do some 3rd class rock hopping to get to the narrow summit of Torment. Enjoy the views and locate the metal can containing the summit register! The register has been there for decades, and there is not much in the way of real estate to sign your name. We managed to squeeze in our names between entries dating back to the early 2000s…
One of the few blank lines left in the summit register’s pages put us back some 14 years ago. I came across some names of my AMGA instructors from years past, including Mark Chauvin, Dale Remsberg, Rob Hess, and Chris Wright. Some climbing history!
Woody and I top out Mount Torment, the first summit stop on the traverse.

On Route:
Descending Torment and Onto the Traverse
From Torment’s summit, you can now grasp the enormity of the terrain ahead of you. This is the first good vantage point on the mountain from which you can see the entire ridge all the way out to the summit of Forbidden!
Strap in and get ready for some alpine adventure, because you still have a lot of ground to cover.
Reverse the terrain from the summit back onto the Southeast Face. You are looking for a series of grassy ledges about 300 vertical feet (estimated) below the summit that head towards a notch in the ridge. There are some rappel stations that some teams use to access these ledges, and they can be a helpful guide in finding the way to the ledges and the notch. We elected to downclimb the rock around the rappel stations. While it went relatively quickly, there were a few “no fall” moments during the downclimb. If you are not comfortable downclimbing 4th class terrain with exposure, use the rappel stations.
Traversing down and to the east will eventually deposit you on a grassy ledge with some relief from the exposure.
Woody reaches the bottom of the more exposed climbing on the Southeast Face to gain the grassy ledge system leading to the rappel station onto the glacier.
The terrain coming down from the summit of Torment. Some brittle rock exists right near the top out.
The grassy ledge system that leads to the short rappel to the glacier.
From the ledges, follow a nice grassy sidewalk through the notch, and at the top of the notch, you will find a rappel station. A short rappel will drop you onto the glacier on the north side of the ridge. Conditions-dependent, weave your way downhill and east. You are aiming for a band of lower-angle rock and loose ledges on the far side of the glacier. Getting to these ledges involves crossing a relatively step, exposed part of the glacier. When we encountered it late in the day, the snow was soft and unconsolidated, making for a much spookier experience. Our attempts to avoid the steepest section of snow got us in trouble with a small moat, whose snow on top began collapsing almost immediately when we got near it.
Woody and I descend Mount Torment and rappel onto the first glacier crossing of the route. Since it was so late in the day, the steeper portions of the glacier became an exercise in climbing soft snow and navigating crevasses and moats...
Since I was in the lead, the moat forced me to retreat and tackle the steepest part of the snow traverse head-on–an “enlightening” experience that made me breathe a sigh of relief once I reach the rock ledges. Woody attempted to straddle part of the snow near the moat. Even with his cautious movements, part of the moat began to collapse under him, stopping only when the lip of snow piled up on some of the slightly better snow below to stop him from sinking further.
Moral of the story: have your guard up towards the end of the glacier traverse. A picket to get through this section is advisable, though if your snow conditions end up as soft as the ones we encountered, a picket might be psychological protection.

Dropping onto the glacier after descending the Southeast Face of Torment.

The first glacier crossing on the route. The first half was straightforward. The latter half of the traverse steepened with soft snow and a small, collapsing moat that, when combined with the exposure down the mountain, made for a real alpine climbing moment!
Woody shows how much he enjoyed the glacier crossing after the snow near a moat started collapsing out from under him.
From the ledges, keep traversing low across them. There are many instances in which gullies tempt you to begin heading straight up. Avoid doing this. We got suckered into one of the gullies early on after leaving the glacier and found ourselves in a sea of loose dinner plates of rock. I gave Woody a terrain belay in one section, having to actually use it to hold a small fall he took when he ripped out a loose handhold.
Stay low and traverse east!
You will eventually reach a rib in the ridge, where the terrain turns a corner and heads up towards the infamous steep snow-ice traverse. This turn in the ridge is the first real place you can bivy. There is a ledge just big enough for 2 people. Since we had such a late start on day 1 and were psychologically exhausted from the loose snow and rock, we elected to bed down on this ledge for the night. The glaring disadvantage to this spot is that it likely to not have any water. Since we had enough water to cook and drink for the night. We elected to recharge for the evening.
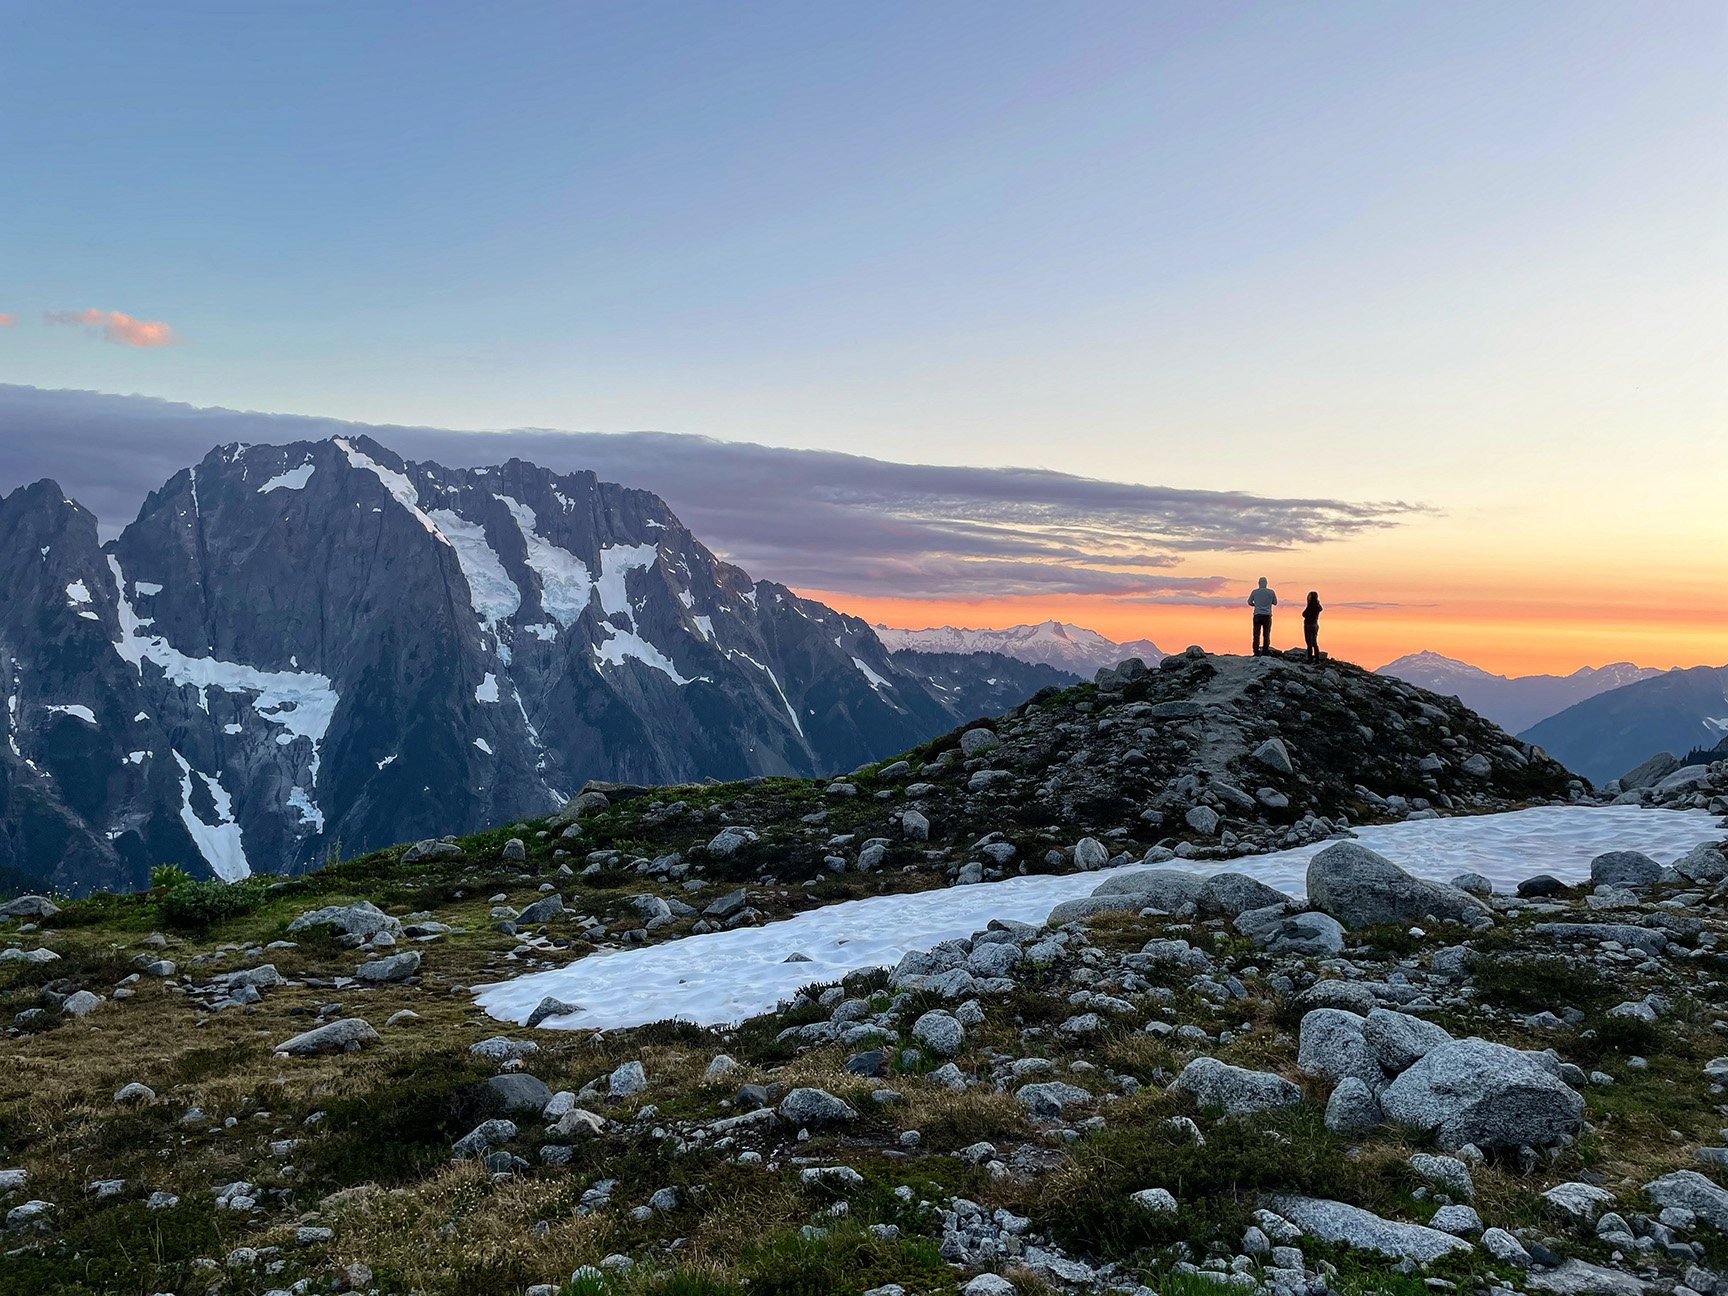
Woody enjoys some of the nest alpine scenery in the country! Eldorado Peak rises from the glacier behind him.
Ready for a night on a tiny bivy ledge!
Predawn view of Forbidden Peak when I woke up before my 4am alarm.
Woody and I decide to bivy on a mediocre ledge after not making it as far as we had hoped on day 1 following a late departure from the trailhead.

The Traverse:
Across the Ridge and to Forbidden Peak
A Grab Bag of Choose Your Own Adventure
The latter half of the TFT has multiple options that different parties describe. Steph Abegg has a great resource from her trip across the ridge. We elected to take a few divergences from her beta, given the conditions we found.
Leaving our bivy perch early in the morning on day 2 (the sky began to lighten starting at around 4:30am), we scrambled across 3rd and 4th class terrain to the start of the snow and ice traverse. Where the snow begins, there is another bivy spot where two people could sleep separately on their own narrow spots.
After some mediocre sleep (but with great alpine views!), Woody and I gear up to make the long push across the ridge to Forbidden Peak.
The snow traverse is straightforward. Thankfully, parties ahead of us had left a semi-melted boot pack across the snowfield. When we encountered it, there was no ice that some trip reports allude to, instead being firm snow, since we crossed it early in the morning. While exposed, the traverse is straightforward. If it were ice, the traverse would certainly feel more difficult and exposed.
Gearing up (and shedding layers) before heading out on the exposed snow traverse in the middle of the ridge.
View towards the snow traverse with a generous bootpack to make crossing a lot easier!
Woody approaches the start of the snow traverse.
Me, getting a tricep workout plunging my ice axe seemingly forever on the traverse.
After the traverse, we diverged from Steph Abegg’s beta. Her beta suggests that the ridge and gendarmes ahead can be tackled by a 4th class climb, threading the needle between steep headwalls and loose terrain higher on the ridge. We elected to skirt to the right (south) side of the ridge in search of easy, grassy, 3rd class ledges described in certain betas, including Beckey’s Cascade Alpine Guide. While we found the ledges, we did not get them in the conditions we hoped for. Since 2020 snowfall was above average, there was more snow left on the route. The otherwise easy ledges were instead half-covered in hard-packed snow, frozen turf, and verglas–water runoff from the melting snowfields that had frozen overnight. All of the frozen turf ledges were down-sloping, leading immediately to a precipitous cliff dropping back down into Boston Basin. After skittering around for a couple hundred meters on this easy but uncomfortably exposed terrain, we decided to don crampons and launch up one of the steeper snowfields that led to a Y-fork in a couple of couloirs (no photos of the frozen turf, but this section of the route is marked on the map at the beginning of the article).
Woody hopped out into the lead, finding hard snow–hard enough that he felt compelled to place one of our two ice screws since he could not hammer in a picket. The hard nature of the snow came as a surprise, considering we were on the south side of the ridge. Perhaps the early hour coupled with the shade provided by the ridge and its minor ribs provided enough shade to keep the snow hard.
Woody launches up one of the more solid sections of the ridge.
In any case, we took the right couloir at the Y-fork, where Woody found a narrow platform and a belay. This left me with an exposed rock step to regain the ridge. Surprisingly, a bunch of quartz-like intrusions made for excellent, blocky holds, keeping the section to 5.6, at most.
We regained the ridge, occasionally riding the spine of the whole formation, but occasionally dropping down onto its sides. When we encountered some gendarmes in the middle of the ridge, we bailed to the south on easy ledges, only to discover the ledges dead-ended. This forced us to backtrack back to the spine and drop down to the north side of the ridge, which is what we should have picked up from Steph’s beta.
Part of the choose-your-own adventure section of the ridge. Different paths through the section are possible!
Some of the chossy ledges you have to negotiate if you do not stay directly on the ridge. You trade some rappels for loose rock…
Once again, the ridge relents, and you are presented with a final choice to gain the notch leading to Forbidden. We elected to drop down the right (south) side of the ridge. While we reached easier terrain sooner, we had to contend with bad rock and awkwardly down-sloping ledges and the occasional water streak on slabs. The guided party that came up behind us when we descended Forbidden stayed on the ridge spine until they rappelled two times just before reaching the notch. They ended up rappelling to reach the easy ground that we had to climb over less-than-ideal terrain in order to reach.
After this last scramble, the notch to Forbidden is dead ahead over easy 3rd class terrain.
Given the conditions we found on-route, we were a bit worked from all the exposure, soft snow, frozen, slick turf, and loose rock. Type 1 fun was hard to come by, which was also probably in part due to our bad sleep the night before obtaining the permit and the dry bivy over the previous two nights. The sight of the West Ridge, with its moderate climbing and relatively better rock quality gave us the last boost of energy and psych we needed to leave the bivy spots at the notch and charge through the remainder of the route (a round trip up and down the West Ridge in just over 3 hours!).
The final section of the ridge where it intersects with the West Ridge route on Forbidden Peak.
The West Ridge:
The Classic with (Lots) of Beta
The West Ridge is an über-classic, an early Fred and Helmey Beckey alpine masterpiece that is well-deserved in its designation of a “North American 50 Classics Climbs.” To that end, there is beta all over the Internet in both trip report and website form that could tell you a million and one ways to climb the ridge. Here, I will be brief but with a few key notes.
The route is well-traversed, with a path of clean rock carved out by many decades of shoes crossing the spine of the ridge. If things get lichen-y, look around to find cleaner ground.
The start of the ridge is easy: a ridge paddle up low-angle terrain. There is one surprise lurking, an exposed step across a steep, narrow notch in the ridge. When the terrain gets too steep to remain moderate directly on the ridge, you will drop onto the left (north) side of the ridge, following blocky terrain and passing a few bright white quartz intrusions.
Above, you will rejoin the ridge crest below a short headwall with a small, left-facing corner. Climb the corner with a few exposed, airy moves (you may even catch a glimpse of a piton that, I wonder, could be from the original Beckey ascent). Lots of easy ridge paddling will take you to the sub-summit, where you have to downclimb off a slightly overhung block to much easier terrain to traverse to the summit. The lower off the block is not that hard, as it includes jugs with plenty of feet once you lower yourself over the edge, but it is certainly thrilling to lower yourself into space and having the trust that easy terrain is just below you!
After a long day with an (extremely) early start, Woody and I get to the final stop on the TFT: Forbidden Peak’s summit! Now to get down…
After a long day 2, Woody and I top out Forbidden Peak, completing the entirety of the Torment-Forbidden Traverse, though the true completion of the route requires reversing the route and rappelling back down to the snowfield below the mountain.
The summit is it, the final destination of the TFT! Of course, this all comes at the price of having to reverse the ridge back to the notch to begin the real descent off the route. The descent should be fairly uneventful. You can reverse a lot of the terrain by downclimbing or down-simuling, if you need protection between you and your partner. Rappel stations will begin above the headwall, with a rappel down and a short scramble to reach the beefy boat cord rappel station above the short corner on the headwall. The rappels will continue down on the north side (now the skier’s right) until it is possible to scramble and climb over 4th class terrain back to the ridge crest itself, where you can reverse the opening section, being mindful of that exposed notch.
Me, crossing the overhung sub-summit block on the way to the summit proper.
Woody prepares the rappel back down the crux pitch of the West Ridge.

Descent Notes
The time of year and snow conditions will dictate your descent. The snow was melted out, undercut, and broken up in the couloir when we began our descent, so we began looking for other options. The guide from Mountain Madness who arrived with his client at the notch bivies right as we returned from the West Ridge recommended we take the Catscratch Couloir rappels, an alternative that we found in a couple of beta sources online, though with few details. Having now done the rappel descent, I would HIGHLY recommend this descent in all but the best snow conditions. The rappel stations are geared well for 30-meter rappels (except the final rappel), all with beefy boat cord at each station (a legacy of the bolt chopping incident involving local climbers and the climbing rangers of North Cascades National Park. Read the story here.)
The “couloir” is more like a blunt rock rib protruding out between two gullies on either side.
The key takeaway on the descent: stay on the rib! Parties can get distracted by the seemingly easier terrain inside the gullies. However, they tend to be loose, and they put climbers into what essentially amounts to a bowling alley of choss.
To access the rib, you need to scramble down from the Forbidden notch on the skier’s right, trending towards the end of the easy ledge system that leads from the south side of the TFT to the West Ridge notch. The first rappel station will be a slung block. A 30-meter rappel will just be enough to get you to the top of the rock rib. When we made the rappel, there was still a sizable chunk of snow at the top, forcing us to squeeze in between a rock protrusion and the snow itself to reach the end of the rappel. Even then, a 30-meter rappel will leave you a few meters shy of the next rappel station. Unrope (the terrain is a good, fairly flat platform), and scramble over to the next station, marked with more boat cord.
The rappels from the start of the rib head straight down the middle of the rib. There are occasionally alternate rappel stations on the other sides of the gullies, but they are just distractions. Some of the rappel stations are hidden, and do not become visible until you step over a bulge or two just above the station itself. Have faith that they are there!
Rappelling the Catscratch Couloir. The key here is to not get suckered into the gully too early. Enter too soon, and you’ll be hemmed in by increasingly high walls that make error correction difficult. It’s also a bowling alley for loose rock if there are parties above.
5 or 6 rappels–I cannot remember exactly how many since I was so zonked at the end of a long two days–will get you down to the glacier. Follow the boat cord rappels on the skier’s right side of the gully. On occasions, brightly colored pieces of webbing in the gully will tempt you top drop into the gully early. AVOID dropping in too early.
When you get to the final boat cord rappel station (should be ~4 rappels down), there will be a natural break in the wall of the gully. The gully walls to this point have been largely too tall to make entering practical. Before you commit to entering the gully and CROSSING it, you can lean out and look.
You should be able to spot a large pedestal on the SKIER’S LEFT of the gully that it on the left margin of the gully and out of the line of fire for any incoming choss. Head to the pedestal. You will know you are in the right place if you find a web or slings and rope connecting various pins and fixed gear that make up what should hopefully be your final rappel, depending on the snow levels below.
Only walking remains from here! The snow slope is still steep enough that you may want to don crampons again, especially if snow conditions and your energy levels at this point leave you feeling a little fatigued and wobbly.
Chase the easiest path down the snowfield, dodging the occasional undercut snow and glide cracks to regain the big heather trail that will lead you back to the Boston Basin campsites and the road home.
If you made it this far, put that feather in your cap, and crack open a beer at the car! You have pulled off one of the classic alpine adventures of the Cascades. Woody and I were pretty exhausted, and I even had to work the following morning. The multi-hour descent back through the woods, complete with river crossings and even some scary snow holes into rushing glacier streams meant that I did not get home to Seattle until 2:30am, after a stop at my company’s gear shed to pick up some equipment for the class I was teaching. I was in bed by 3am with a 7am wake up to run to Exit 38. An enormous 1+ liter thermos of coffee was my closest companion that day.